On this page
The most likely cause is a flashing problem
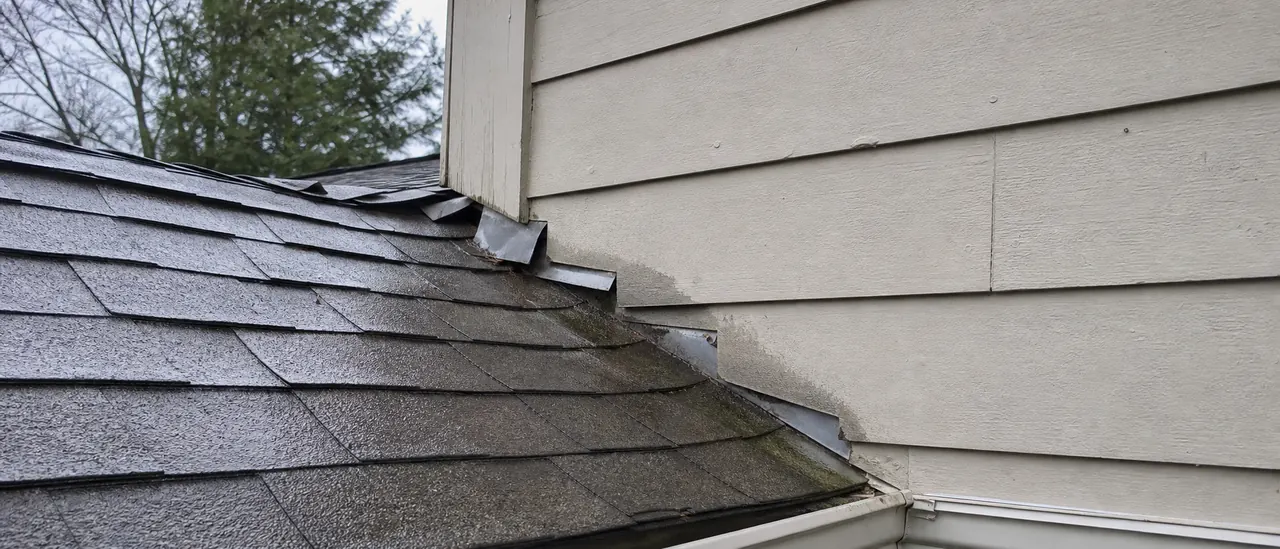
A leak at a roof-to-wall joint most often means water is getting past the flashing system. Flashing is the layered metal or membrane detail that connects the roof’s drainage path to the wall’s water-control layer.
On a sloped shingle roof, individual step-flashing pieces should overlap with the shingles. Their upturned legs must also connect behind the wall’s drainage surface. Missing pieces, poor laps, punctures, displacement, or a connection sealed only to the face of cladding can leave a path for runoff.
Other plausible causes and look-alikes
The eave end deserves special attention. A missing, undersized, or poorly shaped kickout flashing can send concentrated roof runoff down the wall instead of away from it.
Brick or stone veneer creates another possibility. Water can drain behind the veneer, so a visible bead of sealant or face-mounted counterflashing does not prove the concealed drainage layers connect properly. The defect may be in the wall assembly even though moisture appears beside the roof.
| Pattern observed | Plausible explanation | What it does not prove |
|---|---|---|
| Wetting begins at the lower end of a sidewall | Missing or ineffective kickout | That the shingles above are leaking |
| Staining tracks along a sloped roof line | Step-flashing or wall-integration defect | The exact failed piece |
| Moisture appears below brick or stone | Poor through-wall drainage connection | That surface sealant is the full repair |
| Leak appears at a flat-roof parapet | Membrane, coping, or transition defect | That the roof field has failed |
Nearby damaged roofing, an open membrane seam, a coping joint, or water entering higher on the wall can produce a similar indoor stain. The visible drip is therefore a clue, not a diagnosis.
How the entry point is confirmed
Evaluation starts by matching the interior moisture pattern to the exterior geometry. From safe, accessible areas, an inspector can examine the roof covering, flashing laps, kickout, cladding interface, membrane terminations, and coping while looking for corrosion, openings, displacement, or concentrated runoff marks.
If visual evidence is inconclusive, a qualified evaluator may use controlled water testing. Testing should isolate one detail at a time; flooding the whole area can create misleading results or force water into a sound assembly. Concealed connections may require limited removal of cladding or finishes with the owner’s permission.
The stain may not sit below the opening
Water can follow roof decking, framing, or wall layers before becoming visible. Confirmation depends on tracing the route, not assuming the nearest exterior joint failed.
Urgency and practical next step
An active or recurring leak warrants prompt evaluation because the entry path may be concealed. Avoid relying on a new surface bead of sealant as proof of correction; it can hide the joint without restoring the intended drainage path.
A qualified roof or building-envelope evaluator can distinguish a local flashing repair from a wall-drainage or parapet detail that needs broader correction. The practical goal is to restore a continuous path that directs water down and out.